
How to Get Your Bike Ready for Summer: 5 Simple Steps

The sun is shining, the evenings are stretching out, and the open roads and dusty trails are calling your name. But after months of battling winter grit, road salt, or gathering dust in the garage, your trusty steed needs some serious TLC before you hit the saddle.
Whether you are a weekend hobbyist looking for a smooth Sunday pedal or a seasoned pro preparing for race season, knowing exactly how to get your bike ready for summer is the secret to avoiding mechanical failures later in the summer and maximising your fun.
In this guide, we’ll walk you through the essential steps of summer bike maintenance. From deep-cleaning your drivetrain to selecting the perfect seasonal rubber, you will learn the practical skills needed to transform your bike into a fine-tuned, summer-ready machine.
Article Summary:
- Deep cleaning and dry lubrication are non-negotiable: Stripping away winter grime and switching to a dry chain lube prevents dust buildup and keeps your drivetrain running smoothly.
- Heat affects your tyre pressure: Understanding the science behind your tubes and tyres helps prevent dangerous blowouts on hot summer tarmacs.
- Seasonal tyres make a massive difference: Upgrading to specific summer rubber, whether for the road or the trail, dramatically improves your rolling resistance and grip.
What You’ll Need
Before you begin tinkering, make sure you have the right gear. All of these essentials are available right here at the Fawkes Cycles online store!
- Bike wash and a high-quality drivetrain degreaser from Park Tool or Zefal
- A set of cleaning brushes and clean microfibre cloths
- Dry weather chain lube from Weldtite or KMC
- A track pump with an accurate pressure gauge
- A multi-tool or a dedicated hex key set
- Fresh summer tyres (optional, but highly recommended)
How to get your bike ready for summer: The Step-by-Step Process
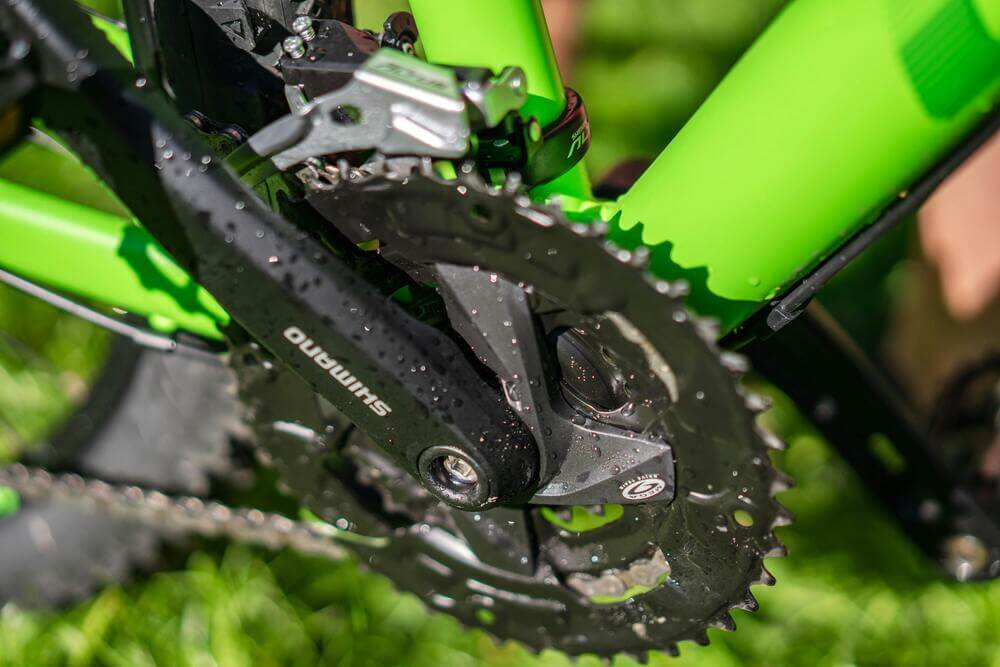
Step 1: Execute a Deep Clean
To do: Strip away the winter grime by thoroughly washing and degreasing your bike.
Why? Winter riding coats your moving parts in a highly abrasive paste of mud, salt, and water. Even if your bike is stored indoors, dust can accumulate in the drivetrain. Apply a dedicated bike degreaser to your chain, cassette, and chainrings. Let it sit, scrub it with a stiff brush, and rinse. Wash the rest of the frame with a gentle bike wash.
Pro-Tip: Never use a high-pressure power washer directly on your bearings (bottom bracket, wheel hubs, headset). It forces water past the seals and strips out the necessary internal grease.
Step 2: Lubricate for Dry Conditions
To do: Apply a dry weather lubricant to your freshly cleaned chain.
Why? Wet lube is great for winter because it repels water, but in the summer, it attracts dust and sand, turning your chain into a grinding paste. Dry lube goes on wet but dries to a protective wax or Teflon layer that keeps your drivetrain silent and clean in dusty conditions.
Top tip: Remember to wipe off any excess lube with a clean rag after applying it to the chain links. Less is more!
Shop dry-weather lubricant from Weldtite or KMC.
Step 3: Check Your Stopping Power
To do: Inspect your brake pads and test your brake levers.
Why? Fast summer descending requires absolute confidence in your brakes. Check the wear indicators on your brake pads (both rim and disc). If they are worn down flat, it’s time for a replacement. If your hydraulic brakes feel “spongy,” they likely need a bleed. If you use mechanical brakes, check the cables for fraying and tighten them if they feel slack.
Shop our Brakes and Cables & Casings collections for spare parts if your components need replacing.
Top tip: How do I bleed hydraulic brakes as a beginner?
If your brake levers feel “spongy,” a brake bleed will flush out trapped air bubbles and restore that firm, safe bite to your ride.
- First, grab a brand-specific bleed kit and the exact brake fluid your system requires (Mineral Oil or DOT), being careful never to mix the two.
- To perform the bleed, safely remove your wheels and brake pads to avoid contamination, replacing them with a plastic bleed block.
- Then, open the bleed ports, attach your syringes or funnel, and gently push the fresh fluid from the bottom calliper up to the top lever until all dirty fluid and air bubbles are expelled.
- Finally, seal the ports and rigorously clean the calliper and lever with isopropyl alcohol before reinstalling your pads, ensuring no stray fluid compromises your braking power.
Step 4: The Great Summer Tyre Switch
To do: Assess your current rubber, check your pressures, and consider swapping to summer-specific treads.
Why? Tyres are your only point of contact with the ground. Switching them out is the easiest way to upgrade your ride quality.
Road bike summer tyres: Winter road tyres are heavy and thick to prevent punctures from road debris. Summer tyres use softer rubber compounds and smoother treads (slicks), drastically reducing rolling resistance so you can ride faster with less effort.
We recommend Any Vittoria tyres for summer riding. Or browse our complete collection of tubeless tyres for road bikes from alternative brands.
Summer mountain bike tyres: Winter MTB tyres have deep, widely spaced spikes to shed thick mud. In summer, those spikes squirm and slow you down. Swap to tyres with a lower profile, tightly packed centre knobs for fast rolling on hardpack and dusty trails, while retaining larger side knobs for cornering grip.
We recommend: Schwalbe is a fantastic brand for summer mountain bike tyres. We highly recommend looking at the Schwalbe Racing Ralph, Schwalbe Thunder Burt, or Schwalbe Wicked Will ranges.
Safety Warning: Why does a bicycle tyre burst during summer? A common summer mechanic issue is the sudden “bang” of a blown tyre. Air expands as it heats up. If you pump your tyres to their absolute maximum limit in a cool garage, rolling them out onto scorching hot summer tarmac causes the air inside to expand further, increasing the internal PSI until the tube violently bursts through the tyre bead. Always leave a buffer in your tyre pressure during heatwaves!

Step 5: Perform an “M-Check” Bolt Inspection
To do: Systematically check every bolt on your bike to ensure everything is torqued correctly.
How: Starting from the front wheel hub, move up to the handlebars, down to the bottom bracket, up to the saddle, and down to the rear wheel (forming the letter “M”). Use your hex keys to ensure nothing has vibrated loose during your last few rides.
Top tip: How do I check bolt torque specs if I’m less experienced?
To safely secure your bike’s components without cracking expensive carbon parts or leaving things dangerously loose, always adhere to the manufacturer’s torque specifications.
- Start by locating the recommended tension value, measured in newton-meters (Nm), typically printed directly on parts such as your stem, seatpost clamp, or brake levers.
- Next, use an adjustable click-style torque wrench and set its dial to the exact Nm value.
- Turn the bolt smoothly with the correct bit until you feel and hear the wrench’s distinct “click,” then stop immediately to ensure a perfectly tightened, ride-ready setup.
Troubleshooting / Common Issues
Issue: My gears are clicking or skipping after I cleaned the bike.
Solution: Your gear cables may have stretched, or you may have bumped your derailleur. Try turning the barrel adjuster on your rear derailleur half a turn counter-clockwise to add a little tension back into the cable.
Issue: My disc brakes are suddenly squealing loudly in the dry weather.
Solution: You likely contaminated the brake rotors or pads with degreaser or spray lube during Step 1 or 2. Clean the metal rotors thoroughly with isopropyl alcohol. If the porous pads absorbed the oil, they usually need to be replaced.
Issue: My tubeless tyres won’t hold pressure.
Solution: Tubeless sealant dries out over time, especially in warm weather. Remove the valve core and inject a fresh top-up of tubeless sealant to keep punctures at bay.
How often should I repeat these maintenance steps throughout the summer?
The frequency of your summer maintenance depends entirely on how often and how hard you ride. However, to keep your bike running smoothly and safely all season long, follow this general rule of thumb:
- Before Every Ride: Check your tyre pressures (remembering that summer heat expands air!) and give your brake levers a quick squeeze to ensure they feel firm.
- Every 100–150 Miles (or every couple of weeks): Give your chain a quick wipe-down with a clean rag, then reapply your dry-weather lube. If you’ve been riding on highly dusty trails or have got caught in a sudden summer downpour, perform a full drivetrain deep clean.
- Once a Month: Perform the “M-Check” bolt inspection to catch any components that might have vibrated loose over rough terrain. This maintenance step is also the perfect time to visually check your brake pads and tyre treads for excessive wear.
- As Needed: Bigger jobs, like bleeding your hydraulic brakes or topping up tubeless sealant, usually only need doing when you notice a drop in performance (such as a spongy lever or a tyre that won’t hold air overnight) or roughly every 3 to 6 months.
Summer bike maintenance sorted with Fawkes Cycles
By taking the time to clean, inspect, and tweak your setup, you’ve successfully transformed your bicycle into a highly efficient summer machine. Mastering these basic mechanical skills not only saves you money at the repair shop but also guarantees a safer, faster, and more enjoyable riding season.
Now that your bike is dialled in, it’s time to map out your next big route, fill up your water bottles, and hit the great outdoors!
Ready to upgrade your ride? Shop the premium degreasers, dry lubes, tools, and high-performance summer tyres we used in this guide directly at the Fawkes Cycles Store. We have exactly what you need, whether you are chasing KOMs on the road or shredding local trails.
You also might be interest in:

Comments are closed here.